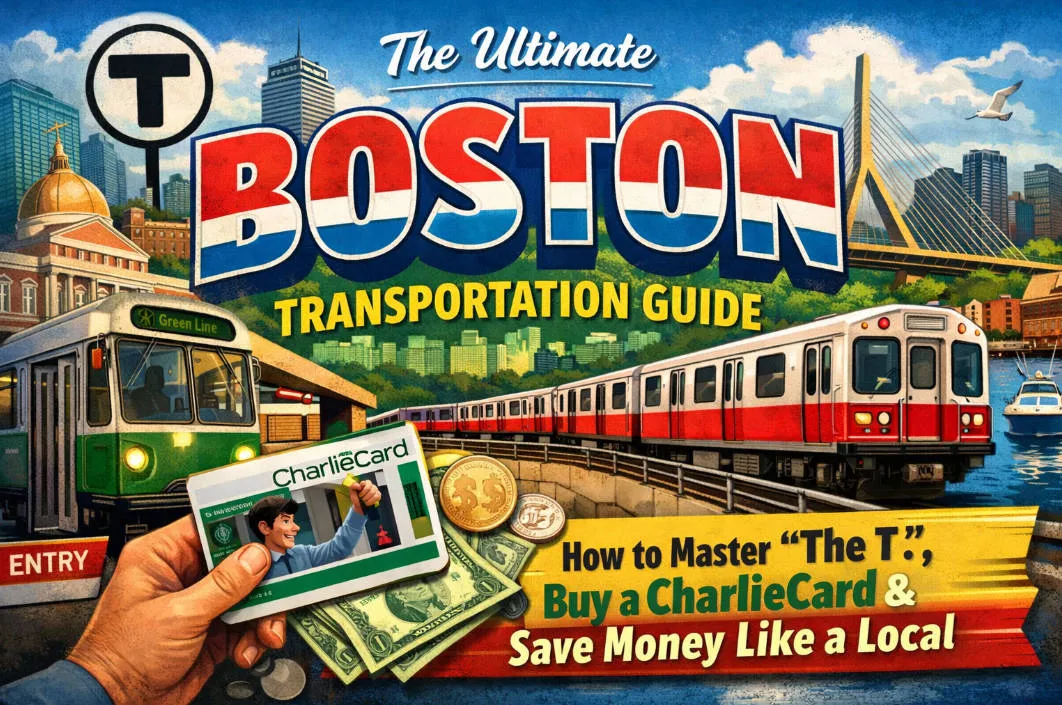
Are you planning a trip to Boston in 2026? As one of America's most walkable cities, Boston offers a historic yet high-tech public transit system. Operated by the Massachusetts Bay Transportation Authority (MBTA), the system—affectionately known as "The T"—is your lifeline to exploring Harvard, MIT, Fenway Park, and the Freedom Trail.
This guide will break down the routes, ticket options, and expert money-saving hacks to help you navigate Boston like a local.
1. What Is “The T”? (Boston’s Public Transit Explained)
“The T” is the local nickname for Boston’s public transportation system, officially called the MBTA (Massachusetts Bay Transportation Authority). If you live in, study in, or visit Boston, mastering “The T” is the fastest way to get around the city like a local.
Why Is It Called “The T”?
The nickname comes from the “T” symbol used to mark subway entrances across Boston. Over time, locals stopped saying “MBTA” and simply say:
“Take the T.”
You’ll hear this phrase everywhere—from students and commuters to taxi drivers.
What Transportation Does “The T” Include?
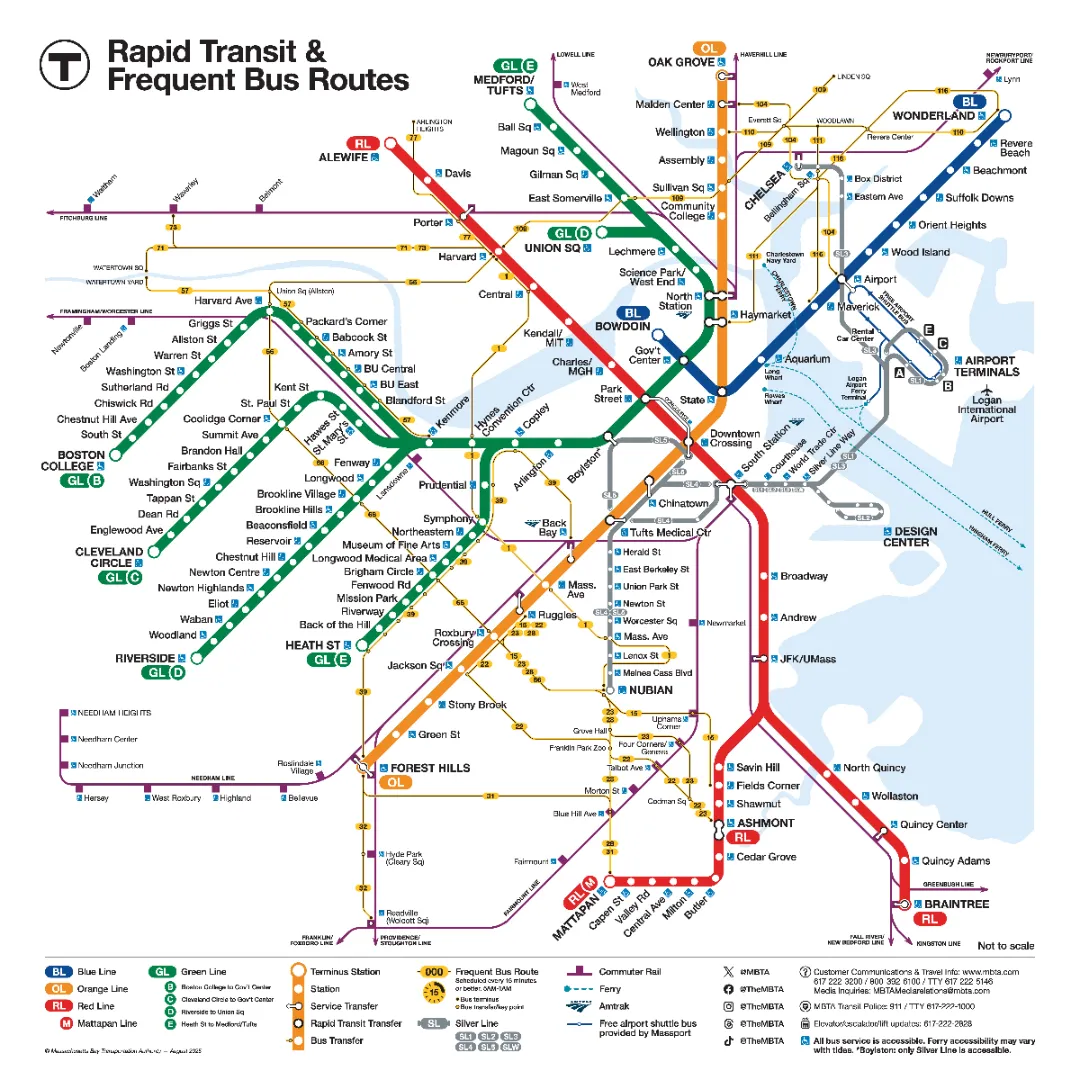
“The T” is not just the subway. It’s a complete public transit network, made up of five main parts:
🚇 Subway (Most Tourists & Students Use This)
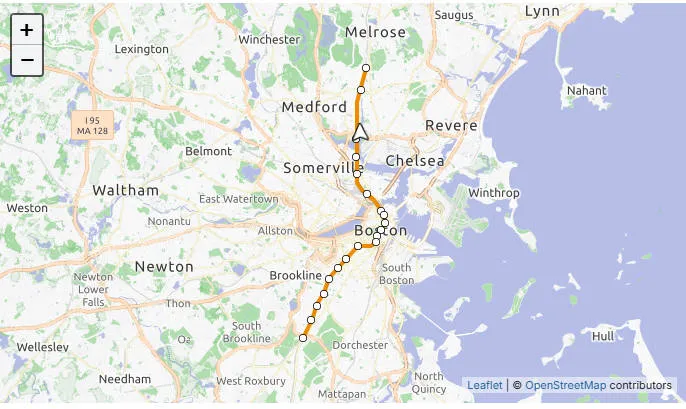
Boston’s subway system has four color-coded lines:
-
Red Line – Harvard, MIT, Downtown Crossing, South Station
-
Green Line – Boston University, Northeastern, Fenway Park
-
Orange Line – Downtown, Back Bay, North Station
-
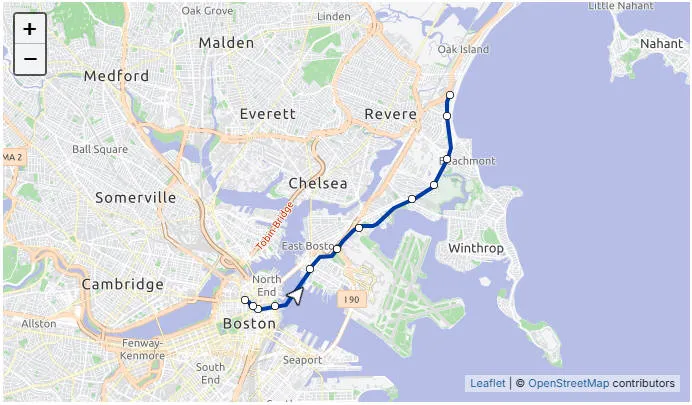
Blue Line – Airport (BOS) to Downtown
💡 Good to know: Boston’s subway is the oldest in the U.S., so stations may feel small or historic compared to NYC.
🚌 Buses
MBTA buses cover areas the subway doesn’t reach, including many residential neighborhoods. They’re slower than the subway but essential if you live off the main lines.
🚆 Commuter Rail
This is regional rail, not a subway.
-
Designed for people commuting from suburbs into Boston
-
Much more expensive than subway rides
-
Trains run less frequently (especially on weekends)
👉 If you live far outside the city (e.g. Quincy, Waltham, Lowell), you’ll likely use this.
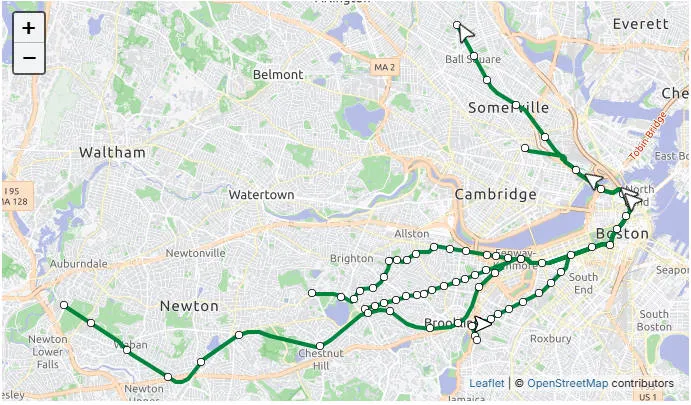
🚊 Green Line Trolley (Streetcar)
Part of the subway system, but some sections run above ground and share streets with cars—very unique to Boston.
🚢 Ferries (Limited but Scenic)
MBTA ferries connect Downtown Boston with:
-
Charlestown
-
East Boston
-
Some harbor islands
Not essential, but fun and scenic.
Who Uses “The T” the Most?
-
College students & international students
-
Daily commuters
-
Tourists staying downtown
-
Anyone who doesn’t want to drive in Boston traffic
Boston is not a car-friendly city—narrow roads, expensive parking, and confusing layouts make public transit the smarter choice.
Is “The T” Easy for First-Time Users?
Yes—but with a learning curve.
Pros
-
Cheap compared to Uber
-
Covers most major attractions
-
No need to drive or park
Cons
-
Old system → delays happen
-
Can be confusing without a map
-
Weekend service changes are common
That’s why understanding CharlieCards, passes, and money-saving tricks is critical—which we’ll cover next.
2. Boston Subway Lines Explained (Beginner-Friendly)
Boston’s subway system is small compared to New York or London, but that’s actually a good thing. There are only four main subway lines, each identified by a color, making “The T” relatively easy to learn—even on your first day.
If you understand what each line is best for, you’ll avoid confusion and save time.
🚇 The Four Boston Subway Lines (At a Glance)
| Line Color | Best For | Key Areas Served |
|---|---|---|
| Red Line | Students & commuters | Harvard, MIT, Downtown, South Station |
| Green Line | Universities & sports | BU, Northeastern, Fenway Park |
| Orange Line | Downtown travel | Back Bay, Downtown Crossing |
| Blue Line | Airport access | Logan Airport → Downtown |
🔴 Red Line – The Student Favorite
Best for: Harvard, MIT, Cambridge, downtown Boston
The Red Line is one of the most used lines, especially by college students and office commuters.
Key stops
-
Harvard – Harvard University
-
Kendall/MIT – MIT & tech companies
-
Park Street – Central downtown transfer hub
-
South Station – Amtrak, Commuter Rail, buses
💡 Local tip: The Red Line splits into two southern branches—Ashmont and Braintree—so always check the train’s destination.

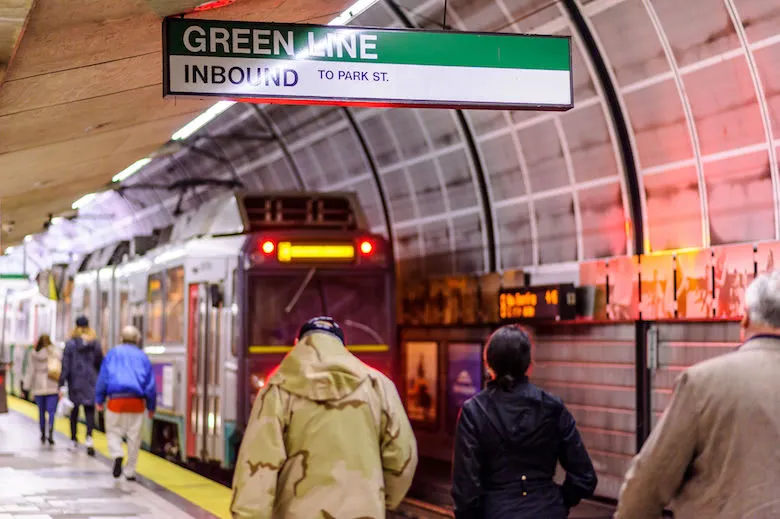
🟢 Green Line – The Most Confusing (But Most Useful)
Best for: Boston University, Northeastern, Fenway Park
The Green Line is unique because it operates partly as a street-level trolley and has four branches:
-
B Line – Boston University
-
C Line – Brookline
-
D Line – Fastest branch (more like a real subway)
-
E Line – Northeastern, Longwood Medical Area
⚠️ Beginner warning: Trains look identical but go to different destinations. Always check the letter (B/C/D/E) before boarding.
🟠 Orange Line – Downtown Connector
Best for: Back Bay, downtown travel
The Orange Line runs north–south and connects many major areas quickly.
Key stops
-
Back Bay – Shopping, hotels
-
Downtown Crossing – Shopping & transfers
-
North Station – TD Garden, commuter rail
👍 Why locals like it: Fast, straightforward, no branches.
🔵 Blue Line – Airport Line
Best for: Logan Airport access
The Blue Line is the easiest and cheapest way to get from Logan Airport to downtown Boston.
How it works
-
Take the free airport shuttle to Airport Station
-
Board the Blue Line
-
Transfer downtown if needed
📍 Good to know: Blue Line stations are generally cleaner and more modern.
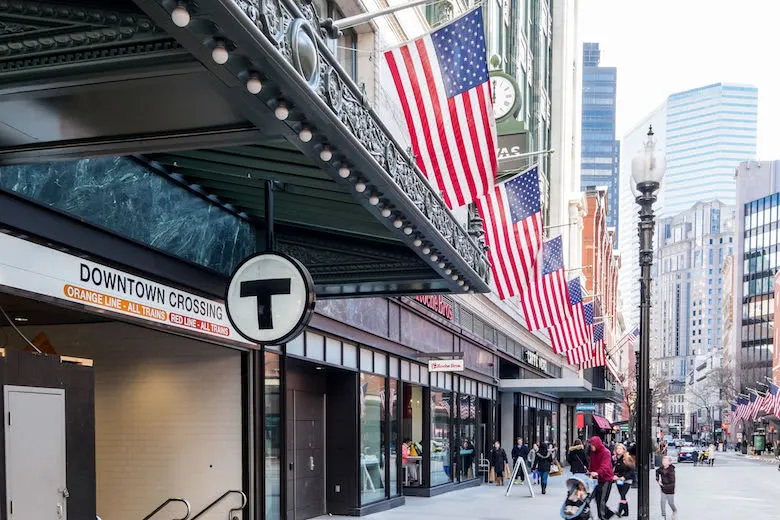
🔁 Where Can You Transfer Between Lines?
Boston has a few key transfer stations you’ll use often:
-
Park Street – Red ↔ Green
-
Downtown Crossing – Red ↔ Orange
-
State Street – Blue ↔ Orange
-
Government Center – Blue ↔ Green
Memorizing these four stations makes navigation much easier.
Is Boston’s Subway 24 Hours?
❌ No.
Most subway service runs from about 5:00 AM to midnight. Late-night travelers should plan for buses or rideshare.
Beginner Survival Tips for “The T”
-
Always check the train destination before boarding
-
Download a MBTA map or Google Maps
-
Expect slower service on weekends
-
When in doubt, ask—Bostonians may look serious, but they’ll help 😉
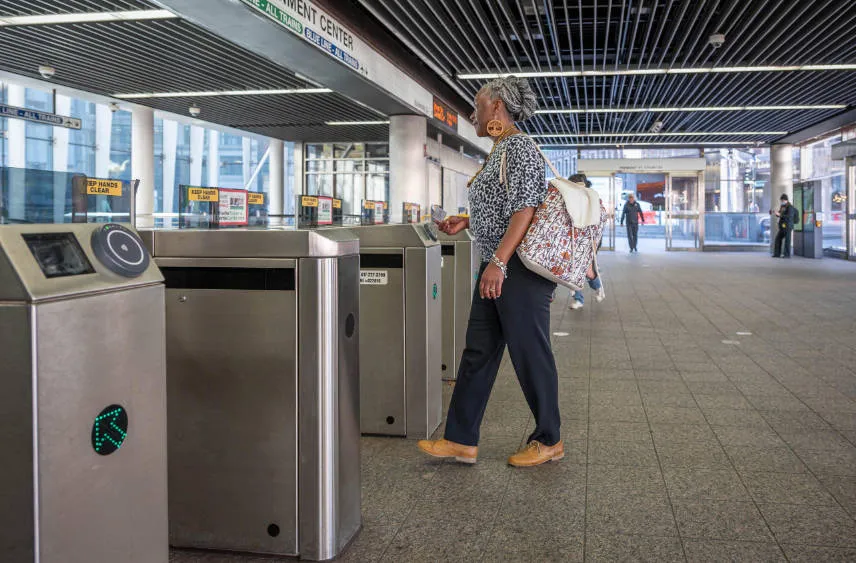
3. How to Pay for The T in 2026
Paying for rides on Boston’s public transit has evolved — in 2026 there are multiple ways to pay depending on how often you ride, whether you want convenience, and how much you value saving money.
🚍 1) Contactless Tap-to-Ride — The New Default
As of 2024 and continuing into 2026, the MBTA has rolled out a modern “Tap-to-Ride” contactless payment system across the subway, buses, and trolley lines. That means:
-
Tap your contactless credit or debit card (with the wave icon)
-
Tap your smartphone or smartwatch using Apple Pay, Google Wallet, or Samsung Pay
-
Just tap the reader once → wait for the green checkmark → ride
💡 Benefits
-
No need to buy or reload a card
-
Perfect for short visits or occasional riders
-
Works instantly — great for tourists
What to watch out for
-
Keep other cards/bags away when tapping — accidental double charges happen if multiple cards are near the reader.
-
This method currently doesn’t work yet on Commuter Rail or ferries until later in 2026.
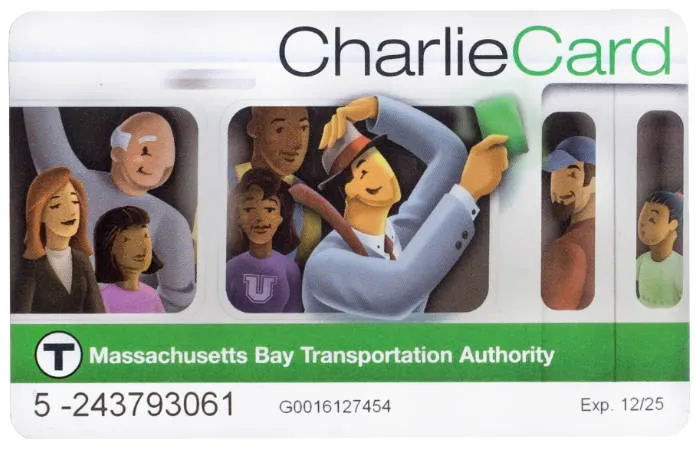
🟩 2) CharlieCard — Still Worth It for Frequent Travelers
The classic CharlieCard (plastic reloadable smart card) hasn’t disappeared — it’s still widely used, especially if you ride often.
Why use a CharlieCard
-
Load stored value or weekly/monthly passes — cheapest option per ride
-
Works on subway, buses, and ferries (but not yet on Commuter Rail with the new system)
You can pick one up at:
-
MBTA stations’ fare vending machines
-
Some City Hall or library locations offering them for free (check current distribution)
💡 Local tip: If you plan to stay for weeks or months, a CharlieCard with a monthly pass almost always saves you money compared with paying per ride.
🎟 3) CharlieTicket — Still Around, But Dying Out
The CharlieTicket is a paper ticket you can buy and use like a CharlieCard, but:
-
It’s less convenient
-
It’s being phased out slowly as contactless tap systems become standard
If you just want a simple one-time fare and don’t have a contactless card or CharlieCard yet, this is still an option — but not the best long-term choice.
💸 4) Cash?
Cash used to be accepted on buses and at some machines, but MBTA is increasingly moving toward digital fares. Most riders now use cards or mobile wallets. If you do use cash, be sure you can load it onto a CharlieCard or buy a pass at a machine before boarding.
🧠 Extra Money-Saving Tips
✅ Use contactless pay strategically
If you’re only here for a few days or hopping on/off the T occasionally, the contactless tap-to-ride method is often faster and avoids ticket machines.
✅ Get a weekly or monthly pass on a CharlieCard
For students, workers, or long stays, passes saved on CharlieCards drop your cost per ride a lot compared to paying each ride individually.
✅ Transfers still work
Transfers between lines and buses are integrated — and if you’re using CharlieCard or contactless payments, the system handles cost differences automatically.
🗓 What’s Coming Soon
🔜 New CharlieCard system expanding in 2026 — This may include digital wallet integration for CharlieCards, expanded Commuter Rail support, and easier top-up options.
Quick Comparison Table
| Payment Method | Best For | How It Works | Pros | Cons |
|---|---|---|---|---|
| Contactless Tap-to-Ride (Credit/Debit Card, Apple Pay, Google Wallet) | Tourists, short stays, occasional riders | Tap your card or phone at the gate/reader | ✅ Fast & convenient✅ No card to buy✅ No reloading needed | ❌ No weekly/monthly passes❌ Easy to double-tap by mistake |
| CharlieCard (Plastic Smart Card) | Students, commuters, long-term stays | Tap the card after loading value or passes | ✅ Cheapest per ride✅ Supports weekly/monthly passes✅ Best for daily use | ❌ Need to get & reload card |
| CharlieTicket (Paper Ticket) | One-time or backup use | Paper ticket from vending machine | ✅ Simple fallback option | ❌ More expensive per ride❌ Easy to damage❌ Being phased out |
| Cash | Rare / emergency use | Load cash at machines or pay on some buses | ✅ Works without bank card | ❌ Inconvenient❌ Limited acceptance |
| Commuter Rail Ticket/App | Suburban commuters | Buy zone-based ticket | ✅ Covers long distances | ❌ Not part of subway system❌ Much more expensive |
4. CharlieCard vs CharlieTicket: Which One Should You Choose?
If you’re new to Boston or just stepping off the plane, one of the first decisions is: CharlieCard or CharlieTicket? Both are MBTA fare options, but they serve different needs.
🟩 CharlieCard — The Local Favorite
What it is: A plastic, reloadable smart card that stores either cash value or passes (weekly/monthly).
Best for:
-
Students, commuters, long-term residents
-
Anyone planning to ride frequently (subway, bus, ferries)
Pros
-
✅ Cheaper per ride than paper tickets
-
✅ Supports weekly/monthly passes
-
✅ Can reload online or at vending machines
-
✅ Works across most MBTA services (subway, bus, ferry)
Cons
-
❌ Needs to get the card first (from a station or distribution center)
-
❌ Less convenient if you’re just visiting for a day or two
💡 Pro tip: If you’re staying for a week or more, a CharlieCard with a weekly pass can save you up to 40% per ride compared to single fares.
🟨 CharlieTicket — The One-Time Option
What it is: A paper ticket loaded with stored value or a single fare.
Best for:
-
Short-term visitors
-
People who rarely ride the T
Pros
-
✅ No card needed — just buy a ticket at a vending machine
-
✅ Good backup if you forget a CharlieCard
-
✅ Works for single rides or day trips
Cons
-
❌ More expensive per ride than a CharlieCard
-
❌ Easy to lose or damage
-
❌ Being phased out gradually in favor of CharlieCard and contactless payments
💡 Visitor tip: If you’re only riding a few times, a CharlieTicket is fine, but if you plan more than 5 rides, switching to a CharlieCard is cheaper.
⚖️ Side-by-Side Comparison
| Feature | CharlieCard | CharlieTicket |
|---|---|---|
| Cost per ride | Lower | Higher |
| Reloadable | ✅ | ❌ |
| Weekly/Monthly Pass | ✅ | ❌ |
| Convenience for tourists | Medium | ✅ (for 1-2 rides) |
| Durability | Long-lasting | Easy to lose/damage |
| Available at stations | ✅ | ✅ |
| Contactless tap | ✅ | ❌ (paper only) |
✅ How to Decide
-
Short trip / 1-2 rides: CharlieTicket
-
Staying a week or more / multiple rides: CharlieCard
-
Daily commuting or student life: CharlieCard + weekly/monthly pass
-
Tourists with contactless cards: You can skip both and tap your phone/credit card
💡 Extra Local Tip: Even with a CharlieCard, keep a small backup CharlieTicket or cash for buses in case a machine is down or your card runs out of value.
💰 Fare Difference (2026)
-
CharlieCard subway ride: ~$2.40
-
CharlieTicket subway ride: ~$2.90
👉 CharlieCard saves money every single ride.
5. Where to Buy a CharlieCard (Very Important)
Getting a CharlieCard is one of the first things you should do once you know you’ll be riding the T frequently. Luckily, in 2026 there are more ways than ever to pick one up or reload it — from official MBTA centers to station machines and city partner locations.
🚉 1) MBTA Subway Stations (Most Common)
You can get a CharlieCard directly at many subway stations:
-
Most fare vending machines at major MBTA stations now offer CharlieCards.
-
Stations with frequent staff are most reliable (e.g., Park Street, North Station, South Station, Back Bay).
💡 Local tip: At busy downtown stations there are often MBTA staff who can hand you a CharlieCard if machines run out.
🏢 2) Charlie Service Center (Official MBTA Store)
There’s a central service location in downtown Boston where you can:
-
Get a brand new CharlieCard
-
Replace a lost or expired card
-
Purchase weekly or monthly passes
-
Add value or manage certain accounts
📍 Charlie Service Center at 296 Washington Street, Boston, MA 02108 (near State Street T station).
This is the most reliable place if you want full ticketing help, passes, or replacements.
🏠 3) City Hall & Public Library Locations (Free Cards)
Through partnerships between the City of Boston and the MBTA, you can now pick up a CharlieCard for free at several government and library locations — great if you’re a longer‑term visitor or new resident and don’t want to struggle with station machines.
Examples of places offering CharlieCards:
-
Boston City Hall (various lobbies/reception areas)
-
Boston Public Library branches in neighborhoods like:
-
Egleston (Roxbury)
-
Fields Corner (Dorchester)
-
Mattapan
-
East Boston
-
Charlestown
-
Brighton
-
Jamaica Plain
-
West Roxbury
-
Roslindale
-
Hyde Park
-
📌 Note: These vary by location and stock, so calling ahead is a good idea.
🏛 4) Select Retail or Municipal Partners
Some cities near Boston (like Cambridge) and certain municipal offices or community centers may offer CharlieCards for free as well — especially for residents or students.
This is handy if you live or study outside Boston proper but still use the T regularly.
🛬 5) Logan Airport & Transit Hubs
If you’re landing at Logan Airport and want to get your CharlieCard right away:
-
Fare machines at Blue Line airport stations often can issue new cards.
-
Alternately, take the free Logan shuttle → T station and buy/reload once downtown.
💳 How to Reload Your CharlieCard
Once you have a card, you can load value or passes:
-
At fare vending machines in nearly every subway station
-
At the Charlie Service Center
-
Sometimes at partner retail locations (check the MBTA site for current list)
📌 Important: Online reloading has changed, so most recharges now happen in person at machines or service centers, not on the older MyCharlie website.
6. Boston Subway & Bus Fares (2026)
Understanding MBTA fares is one of the most important parts of mastering the T — especially if you want to save money and ride smart during your trip or stay.
🧾 Base Fares (Standard)
These are the main fares you’ll pay for most rides:
-
🚇 Subway & Silver Line: ~$2.40 per trip
-
🚌 Local Bus: ~$1.70 per ride
-
🚍 Express Bus: ~$4.25 – $5.25 (depending on route)
-
🚢 Ferry (Inner Harbor): ~$2.40 (outer services cost more)
-
🚆 Commuter Rail: Varies by zone (Zone 1A same as subway, farther zones more expensive)
💡 Quick tip: If you’re only riding the subway and buses, you can plan ~$10–$15 per day on average for multiple rides — less if you get passes.
🎟 Unlimited Passes (Save Money)
If you’ll be riding often, consider these:
| Pass | What It Covers | Best For | Fees |
|---|---|---|---|
| 1‑Day Pass | Unlimited subway & local buses for 24 hours | Tourists & busy travel days | $11.00 |
| 7‑Day Pass | Unlimited subway & buses for 7 days | Short trips or working weeks | $22.50 |
| Monthly LinkPass | Unlimited rides for a calendar month | Students & long stays | $90.00 |
👉 These passes usually pay for themselves after enough rides — for example, a 7‑Day pass often works out cheaper than paying for ~9 individual one‑way subway trips.
🔄 Free Transfers
If you transfer between subway lines or between bus and subway within a couple hours, the MBTA’s fare rules generally handle this automatically with a CharlieCard — so you only pay the difference (e.g., bus → subway).
🗺 Reduced Fares
If you’re eligible for reduced fare programs (students, seniors, people with disabilities), you can pay about half the regular price on subway and bus fares.
🧠 Money‑Saving Tips
✅ 1‑Day Pass is worth it if you’ll ride >5–6 times in a day.
✅ 7‑Day Pass is often ideal for week‑long trips or class schedules.
✅ Monthly Pass saves most if you stay longer than ~1 month.
✅ Transfers are built‑in with CharlieCard — less hassle, lower cost.
✅ Use contactless tap when you forget your CharlieCard — the system is updated and widely accepted.
🚆 Special Note on Commuter Rail
For trips outside central Boston on the MBTA’s commuter rail, fares are zone‑based — meaning the farther out you go, the higher the price. Zone 1A rides (closest in) cost roughly the same as the subway.
7. How to Use The T Step-by-Step (First-Timers)
Riding Boston’s T for the first time can feel intimidating, but once you know the steps, it’s simple. Here’s a step-by-step guide to get you from station entry to your destination.
Step 1: Plan Your Trip
-
Open Google Maps, the MBTA app, or a printed MBTA map.
-
Identify your starting station, destination station, and line color (Red, Green, Orange, Blue).
-
Check if you need any transfers between lines.
💡 Tip: Check for weekend or late-night service changes on MBTA.com — trains sometimes skip stops or run on altered schedules.
Step 2: Choose Your Fare
Decide how you will pay for the ride:
-
CharlieCard – best for frequent riders
-
CharlieTicket – good for one-time or short visits
-
Contactless card/phone – convenient for tourists
Step 3: Enter the Station
-
Locate the T entrance (look for the big black “T” sign).
-
Go to the fare gate.
-
Tap your CharlieCard, CharlieTicket, or contactless card on the reader.
-
Green light = entry successful
-
Red light = try again or use another card
-
💡 Tip: Hold the card flat against the reader for 1 second — don’t swipe like a credit card.
Step 4: Find Your Train
-
Follow signs for your line color (Red, Green, Orange, Blue).
-
Check the train’s destination sign — some lines split into branches (e.g., Red Line to Ashmont or Braintree; Green Line B/C/D/E branches).
-
Wait behind the yellow safety line until the train stops.
💡 Tip: If unsure, ask a local — most people are helpful.
Step 5: Board & Ride
-
Let passengers exit first.
-
Board quickly and find a seat or stand safely.
-
Hold onto poles or handrails, especially if the train jerks.
-
Watch for your stop — station announcements and signs are in every car.
Step 6: Transfer if Needed
-
If your trip requires a transfer, get off at a transfer station.
-
Follow signs to the correct line color.
-
Tap your CharlieCard if required — usually not for subway-to-subway transfers.
💡 Tip: Some transfers between buses and subway are automatically handled with CharlieCard — no extra payment.
Step 7: Exit the Station
-
Tap your CharlieCard or ticket at the exit gate if required (usually only for some bus/subway combinations).
-
Follow signs to the street or connecting bus/transfer.
Step 8: Riding a Bus
-
Check the bus number and route online or at the bus stop.
-
Board through the front door.
-
Tap your CharlieCard or insert exact cash into the farebox.
-
Pull the stop request cord when your stop is near.
-
Exit through the rear or front door depending on bus type.
💡 Tip: Buses are slower than subway but essential for neighborhoods off the subway lines.
Step 9: Optional Ferries
If you take a ferry, just tap your CharlieCard or purchase a ticket at the terminal. Most ferry routes are short and scenic, ideal for tourists.
Step 10: Safety & Local Etiquette
-
Stand to the right on escalators to let people pass.
-
Keep bags close and be aware of pickpockets in crowded areas.
-
Don’t block doors; let passengers exit first.
-
Avoid eating or drinking on trains — it’s frowned upon.
Quick Checklist for First-Timers
-
Check line color and train direction
-
Have fare ready (CharlieCard, ticket, or contactless)
-
Let people exit before boarding
-
Hold on, watch your stop, and transfer if needed
-
Exit safely and follow street signs
💡 Local Tip: Most Bostonians are friendly but in a rush — asking politely for directions or confirming train direction is completely normal.
8. The T vs Uber vs Walking: What’s Best?
Boston is a compact city, but the best way to get around depends on your budget, time, and comfort level. Here’s a breakdown comparing the T, Uber/Lyft, and walking.
🚇 Option 1: The T (Subway & Bus)
Pros
-
✅ Cheapest option – subway rides ~$2.40, bus ~$1.70
-
✅ Covers most of downtown and popular neighborhoods
-
✅ Avoids Boston traffic and parking hassles
-
✅ Local experience; easy to transfer between lines
Cons
-
❌ Can be crowded during rush hours
-
❌ Stations and trains are older, some feel cramped
-
❌ Service changes on weekends or holidays
Best For:
-
Students, tourists on a budget, anyone avoiding driving downtown
🚗 Option 2: Uber / Lyft / Rideshare
Pros
-
✅ Door-to-door convenience
-
✅ Comfortable, air-conditioned, no transfers needed
-
✅ Useful late at night when the T isn’t running
Cons
-
❌ Expensive for frequent trips (downtown rides often $10–$20)
-
❌ Subject to traffic delays (especially during rush hour or events)
-
❌ Surge pricing during peak times can be brutal
Best For:
-
Travelers with luggage
-
Late-night trips
-
Small groups sharing the cost
🚶 Option 3: Walking
Pros
-
✅ Free
-
✅ See the city up close – perfect for tourists
-
✅ Often faster than a short T ride in downtown
-
✅ Good exercise
Cons
-
❌ Boston streets are narrow and confusing
-
❌ Weather-dependent (hot summers, cold winters, rain/snow)
-
❌ Long distances tiring if carrying luggage
Best For:
-
Downtown areas (Back Bay, Beacon Hill, Downtown Crossing, North End)
-
Short trips under 1–2 miles
-
Exploring Boston attractions on foot
💡 Local Tips
-
Mix & match: Often, a short walk + T ride is the fastest and cheapest combo.
-
Avoid Uber downtown during rush hour: It can be slower than the T.
-
Walking maps: Use Google Maps or Apple Maps for the quickest pedestrian routes — Boston streets can be tricky.
9. Safety Tips for Riding The T
Riding Boston’s T is generally safe, but like any big city transit system, it’s smart to stay alert and follow a few basic safety practices. Here’s what every first-timer should know.
🚶 General Safety
-
Stay aware of your surroundings: Keep your phone and valuables close.
-
Avoid empty train cars at night: If possible, ride in a car with other passengers.
-
Stand clear of the platform edge: Wait behind the yellow safety line until the train stops.
-
Use well-lit entrances/exits: Especially at night.
💳 Protect Your CharlieCard & Valuables
-
Don’t leave your CharlieCard, phone, or wallet visible — pickpocketing can happen on crowded trains and buses.
-
Avoid letting strangers handle your card or phone.
🚍 On Buses
-
Board and exit through the designated doors.
-
Pull the cord or press the stop button before your stop so the driver knows to stop.
-
Hold onto handrails, especially if standing.
🚆 On the Subway
-
Let passengers exit before you board.
-
If standing, hold the poles or straps.
-
Watch your step when entering or leaving a car, some older cars have gaps or uneven floors.
👀 Personal Awareness Tips
-
Plan your route ahead of time to avoid confusion at transfers.
-
Check train schedules during weekends or late nights — service may be limited.
-
Avoid distractions like loud music that prevent you from hearing announcements.
-
In an emergency, MBTA stations have help buttons and intercoms to contact staff.
🌟 Extra Local Tips
-
Travel with friends if possible at night.
-
Keep small change handy if machines or card readers fail.
-
Trust your instincts: If a situation feels unsafe, move to another car or wait for the next train.
✅ Quick Safety Checklist
-
Stay behind platform lines
-
Let passengers exit first
-
Keep valuables secure
-
Hold rails and watch your step
-
Plan your route & check schedules
-
Use well-lit entrances/exits
💡 Local Insider Tip: Most Bostonians are friendly but in a rush — asking politely for help or directions is completely normal. Following these basic safety tips will make your T ride smooth and worry-free.
10. Must-Visit Spots via The T
One of the best things about Boston’s T is that it connects you to nearly all the city’s top attractions. Here’s a guide to must-visit spots and how to get there easily.
🚇 Downtown & Historic Boston
1. Boston Common & Public Garden
-
Lines: Green Line (Boylston or Park Street), Red Line (Park Street)
-
Why Visit: America’s oldest public park, swan boats, and central city green space
2. Freedom Trail
-
Lines: Red Line (Park Street) or Orange Line (State), plus some walking
-
Why Visit: 2.5-mile historical walking trail connecting 16 landmarks, including Paul Revere’s House and Faneuil Hall
🕍 Museums & Culture
3. Museum of Fine Arts
-
Lines: Green Line (Museum of Fine Arts stop on E branch)
-
Why Visit: One of the largest art museums in the U.S., with classic and contemporary collections
4. Isabella Stewart Gardner Museum
-
Lines: Green Line (Fenway stop on D branch), then a short walk
-
Why Visit: Unique Venetian-style museum with stunning architecture
5. Boston Tea Party Ships & Museum
-
Lines: Red Line (South Station), then a 10-minute walk or Uber
-
Why Visit: Interactive museum experience about the famous 1773 event
⚾ Sports & Entertainment
6. Fenway Park
-
Lines: Green Line (Kenmore stop, B/C/D branches)
-
Why Visit: Iconic home of the Boston Red Sox
7. TD Garden
-
Lines: Orange Line (North Station) or Green Line (North Station)
-
Why Visit: Home of the Celtics and Bruins, plus concerts and events
🏬 Shopping & Neighborhoods
8. Back Bay & Newbury Street
-
Lines: Orange Line (Back Bay) or Green Line (Copley)
-
Why Visit: Trendy shopping, cafes, and beautiful brownstone architecture
9. North End (Little Italy)
-
Lines: Green Line or Orange Line (Haymarket or North Station), then walk
-
Why Visit: Famous for Italian cuisine, pastries, and historic charm
🌊 Waterfront & Scenic Spots
10. Boston Harbor & Seaport District
-
Lines: Silver Line (SL1, SL2) or ferry terminals
-
Why Visit: Scenic waterfront, dining, cruises, and the Boston Children’s Museum
11. Charlestown Navy Yard & USS Constitution
-
Lines: Orange Line (Community College or North Station), then short walk
-
Why Visit: Historic naval site with free guided tours
💡 Insider Tips
-
Combine walking with the T: Many spots are just a short walk from stations.
-
Buy a CharlieCard for multiple rides in a day if visiting several locations.
-
Check event schedules: Some museums and stadiums have late-night or special event hours.
Frequently Asked Questions (FAQ)
Q1: Can I share my CharlieCard?
A: Yes. A standard CharlieCard loaded with "Stored Value" (cash) can be tapped multiple times for different people. However, Passes (1-day or 7-day) cannot be shared.
Q2: What if I lose my card?
A: If you registered your CharlieCard online, you can recover your balance. Unregistered cards are like cash—once they're gone, they're gone.
Q3: Can I use my phone to enter the subway?
A: Primarily physical cards, but some gates support mobile wallet pilots.
Q4: Is The T available 24 hours?
A: No. Most lines run roughly 5:00 AM – 12:30 AM.
Q5: Is Boston subway good for luggage?
A: Yes, but avoid rush hours (7–9 AM, 4–6 PM).
Q6: Can I tap a credit card directly?
A: Yes, increasingly common in 2026—tap-and-go at gates for CharlieTicket fares.
The T is your reliable gateway to Boston's wonders in 2026. Grab a CharlieCard (ideally a 7-day pass), use Silver Line for free airport transfers, and download the app for seamless navigation. You'll zip between sights and campuses while keeping costs low—like a true Bostonian. Safe travels!