Renting a car at Miami International Airport (MIA)? Learn how to navigate the free MIA Mover, skip the counter lines, avoid hidden fees, and handle Florida tolls like a pro.
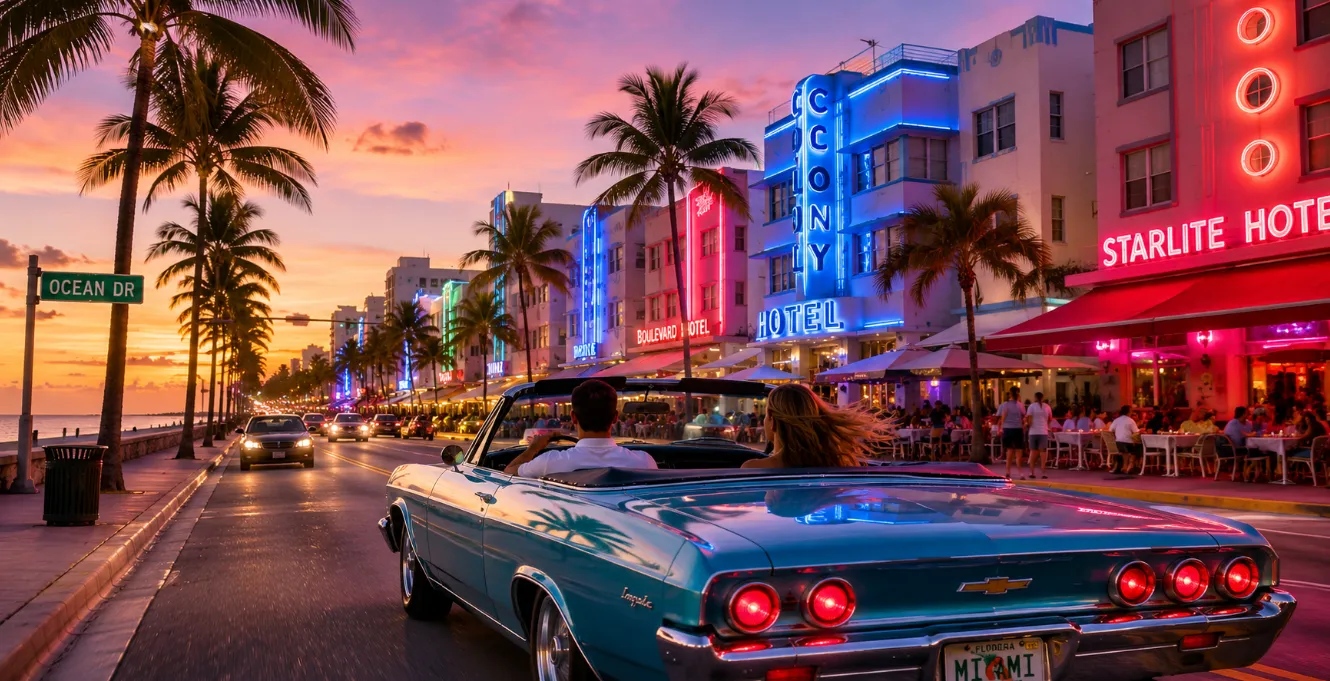
If you are planning a Florida road trip in 2026—whether you are cruising down the sun-drenched streets of South Beach, driving the scenic Overseas Highway to Key West, heading north to Orlando’s theme parks, or exploring the wild depths of the Everglades—renting a car from Miami International Airport (MIA) is likely your very first step.
However, as one of the busiest travel hubs in the United States, Miami’s airport layout can be highly overwhelming for first-timers.
Here is the golden rule you must know before you land: none of the major car rental companies are located at the airport terminals! Instead, they are all housed under one roof at the massive Rental Car Center (RCC), located inside the Miami Intermodal Center (MIC).
To get there, you must take a free automated shuttle train called the MIA Mover.
To ensure your Florida adventure starts on a high note, this ultimate, no-nonsense guide will walk you through navigating the MIA Mover, picking up and returning your vehicle, and dodging the sneaky upselling tactics and hidden fees that catch tourists off guard every single day. Save this link—you’ll need it!
⏱️ 1-Minute TL;DR: Miami Airport Car Rental Survival Guide
Short on time? Here is the absolute minimum you need to know before landing at MIA:
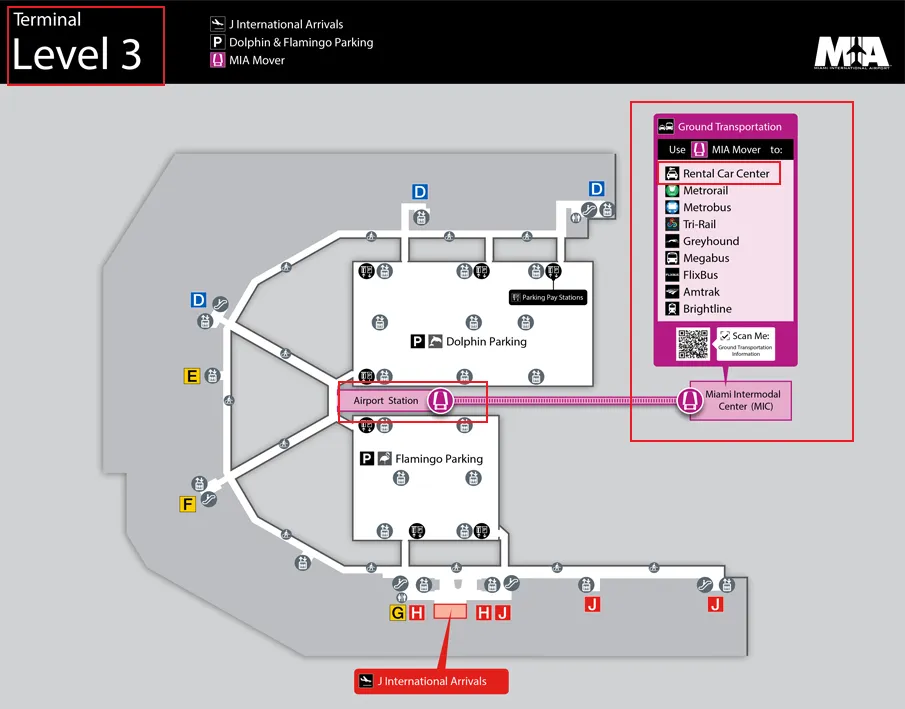
- 🚆 The MIA Mover is Mandatory: There are NO rental cars at the main terminal. You must take the free MIA Mover train from Level 3 to the Rental Car Center (RCC).
- 🚫 Do NOT Walk: The RCC is over a mile away with no pedestrian sidewalks. Walking is dangerous and exhausting in Miami's heat.
- ⛽ The Gas Trap: Never refuel at the gas stations immediately bordering the airport (like Le Jeune Road). They charge predatory prices. Fill up 3 to 5 miles away instead.
- 💸 Tolls (SunPass): Miami highways are almost entirely cashless. Decline the expensive daily toll packages at the counter if you plan to pay-by-plate or use your own portable SunPass transponder.
- 🚭 Smoke-Free Strictness: Sniff your car before leaving the garage! Rental brands at MIA charge a hefty $250 to $450 cleaning fee if they detect smoke upon return.
1. Where is the MIA Rental Car Center (RCC)?
1.1 What is the Rental Car Center (RCC)?
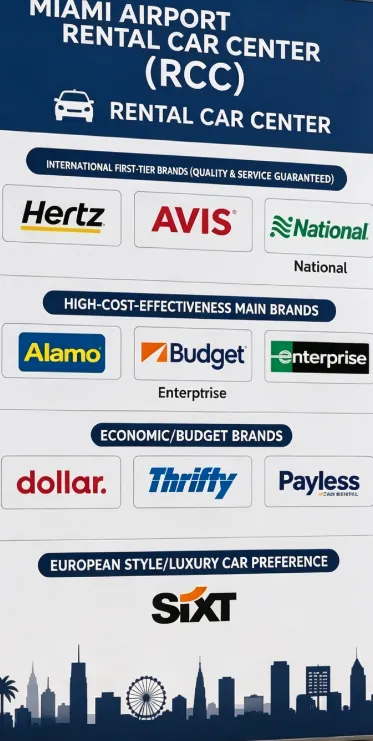
The Rental Car Center (RCC) is MIA’s centralized hub for all major car rental services. Think of it as a massive, multi-level "car supermarket." Almost every rental brand you can name operates out of this single facility.
Major Rental Brands at the RCC:
-
Mid-Tier / Popular Favorites: Alamo, Budget, Enterprise
-
European Flair / Premium Fleet: Sixt
1.2 Understanding the Miami Intermodal Center (MIC)
The RCC is part of a much larger municipal transportation hub called the Miami Intermodal Center (MIC).
The MIC acts as the grand central station of Miami's public transit. From here, travelers can access:
-
The RCC (Car rentals)
-
Tri-Rail: Commuter rail serving Fort Lauderdale and West Palm Beach.
-
Metrorail (Orange Line): Rapid transit connecting directly to Downtown Miami and Brickell.
-
Metrobus: Miami's local bus network.
-
Brightline Connection: High-speed rail connections to Fort Lauderdale, West Palm Beach, and Orlando.
Your Arrival Transit Flow:
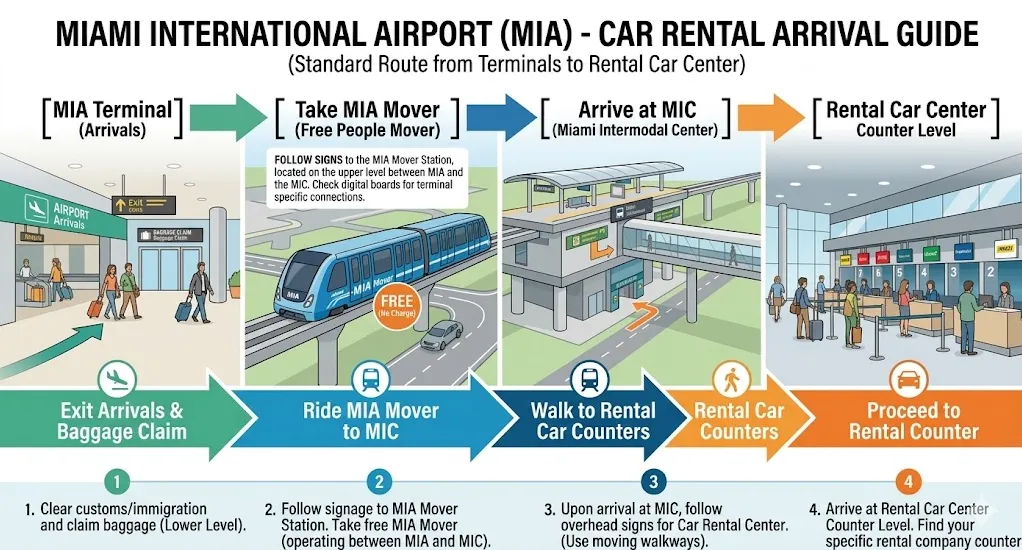
By keeping this simple transit flow in mind, you will easily find your way through the airport.
1.3 Can You Walk to the Miami Airport Rental Car Center? (Don't Try It!)
Looking at a map, the Rental Car Center might seem like it is "just across the street" from the terminals. You might think, "I'll just save some time and walk over with my bags."
-
Our Editorial Verdict: Absolutely do not attempt this.
-
Why walking is virtually impossible:
-
Massive Distance: The actual walking distance is over a mile, separated by heavily trafficked airport access roads and complex multi-lane flyovers.
-
Zero Pedestrian Infrastructure: There are no pedestrian sidewalks, crosswalks, or walking bridges connecting the terminals directly to the MIC on foot.
-
Safety & Climate Hazards: Walking along busy highway ramps dragging heavy luggage in South Florida's year-round intense heat and sudden tropical downpours is both dangerous and exhausting.
-
The airport built the state-of-the-art MIA Mover specifically to solve this problem. It is fast, air-conditioned, free, and by far the safest way to get to your vehicle.
2. How to Get to the Rental Car Center (MIA Mover Guide)
From the moment your plane gates to when you finally sit behind the wheel, there are exactly five straightforward steps to get to the Rental Car Center. Follow this step-by-step walkthrough to navigate like a pro.
2.1 The 5-Step Route to the Rental Car Center (RCC)
Step 1: Deplane and Head to Baggage Claim (Level 1)
-
Domestic Arrivals: Follow the signs to Level 1 to collect your checked bags at the Baggage Claim carousels. If you only have carry-on luggage, you can skip this step and head straight to Step 2.
-
International Arrivals: You must first pass through U.S. Customs and Border Protection (CBP) passport control, collect your luggage in the international arrivals hall, and pass through customs. Once cleared, you will exit into the public arrivals lobby.
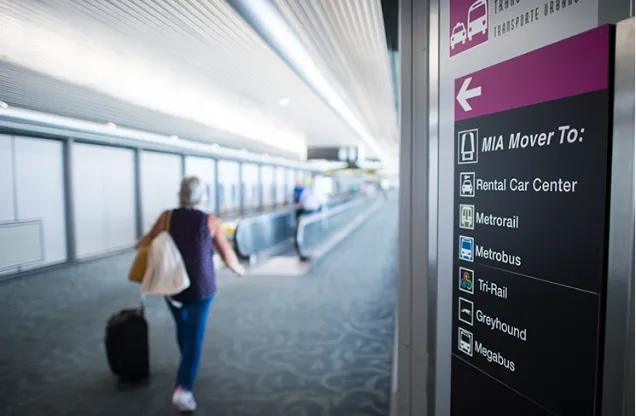
Step 2: Look for the "MIA Mover" Signs (Crucial Warning!)
As you exit the secure area, you will see a variety of signs. Here is a major insider warning:
🚨 Pro Tip: Ignore any signs that say "Rental Cars" pointing to the outside curbside bus stops unless you specifically booked with a small, off-site discount rental company. Curbside buses are for off-site brands only. If you booked with any major brand housed in the Rental Car Center, your only target is the "MIA Mover" or "Miami Intermodal Center (MIC)" sign.
[[copyrightMiami Airport]]
Step 3: Take the Elevator to Level 3 (Skyride)
-
Whether you are on Level 1 (Baggage Claim) or Level 2 (Ticketing/Departures), you need to take an elevator or escalator up to Level 3.
-
Why Level 3? Level 3 houses the Skyride—MIA's network of indoor moving walkways that connect all terminals and parking garages directly to the MIA Mover station.
-
Step onto the moving walkways and follow them all the way through, walking past the Dolphin and Flamingo parking garages.
Step 4: Board the MIA Mover (100% Free)
-
At the end of the Skyride path, you will walk directly into the MIA Mover Station.
-
Cost & Tickets: The MIA Mover is completely free. You do not need a ticket, transit card, or reservation. Just walk right onto the platform with your luggage.
-
Frequency & Service: The train runs 24/7. Trains depart every 2 to 3 minutes during peak hours, and the cars are spacious, fully automated, and heavily air-conditioned.

Step 5: Arrive at the MIC and Enter the RCC Lobby
-
The actual train ride is incredibly fast, taking just about 3 minutes.
-
Exit the train at the Miami Intermodal Center (MIC) station.
-
Follow the overhead signs marked "Rental Car Center Lobby." You will cross an indoor, climate-controlled glass pedestrian bridge.
-
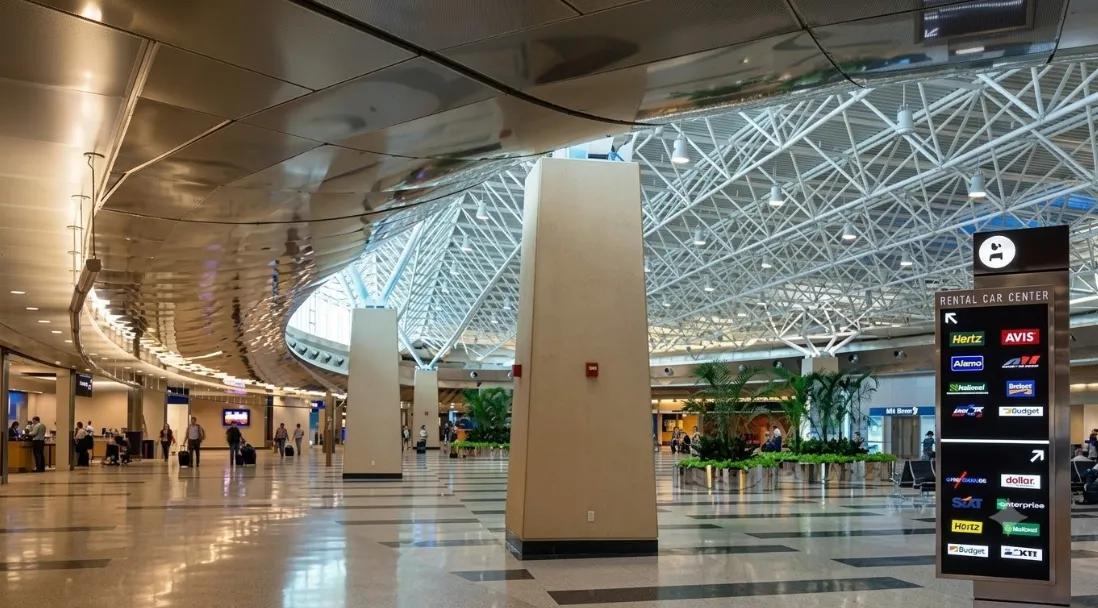
After a quick 2-minute walk, the hallway will open up into the massive, bright Rental Car Center Lobby, where you will see the service counters for all major rental brands.
2.2 Time Estimation: How Long Will It Take?
To help you plan your first-day itinerary (such as hotel check-in times or dinner reservations), here is a realistic breakdown of how much time to budget to get from your plane to the rental counters:
-
US Domestic Arrivals (Carry-on Only): 20 to 30 minutes. You can skip baggage claim and head straight up to Level 3 for the train.
-
US Domestic Arrivals (Checked Bags): 40 to 60 minutes. This includes the standard wait time at the baggage carousel.
-
International Arrivals (Customs + Baggage): 1 to 2.5 hours. This varies widely depending on CBP queue times at Miami's busy international terminal.
Step-by-Step Time Breakdown
|
Transit Step |
Domestic Flights (Est.) |
International Flights (Est.) |
Notes |
|---|---|---|---|
|
1. Deplane & Customs |
10 - 15 mins |
30 - 90 mins |
Customs queue depends on arrival time & flight volume. |
|
2. Baggage Claim |
15 - 25 mins |
15 - 25 mins |
Skip this step if traveling with carry-on luggage only. |
|
3. Walk to Level 3 Station |
8 - 12 mins |
8 - 12 mins |
Depends on your arrival gate (Concourse D is the longest walk). |
|
4. MIA Mover Ride |
5 - 8 mins |
5 - 8 mins |
Includes 2-3 mins waiting on the platform and a 3-min ride. |
|
5. Bridge Walk to Lobby |
3 - 5 mins |
3 - 5 mins |
A short, flat, indoor walk with your luggage. |
|
Total Estimated Time |
40 - 65 mins |
60 - 140 mins |
Use these safety windows for booking your first-day plans. |
💡 Local Tip for American Airlines Passengers: If you land at Concourse D (primarily used by American Airlines), the walk to the MIA Mover can be quite long. To save your energy, take the terminal's internal Skytrain (on Level 4 of Concourse D) to the station closest to the exit before heading to the Level 3 Skyride walkway.
3. MIA Car Rental Pick-Up: Skip the Lines, Dodge Upsells & Inspect Your Car
Once you step into the bustling, neon-lit Rental Car Center (RCC) lobby, the exciting part of your journey begins. However, the pick-up process can be highly stressful if you are unprepared. Long queues and aggressive sales pitches at the counter are common complaints here. Follow this guide to secure your keys smoothly and protect your wallet.
3.1 Skipping the Lines: The Power of Loyalty Programs & Kiosks
During peak travel seasons (such as winter holidays, spring break, and major holiday weekends), wait times at standard rental counters can easily stretch past an hour.
💡 The Ultimate Time-Saving Hack:
To completely bypass the standard queues and head straight to your car, do these two things before your trip:
-
Sign Up for Free Loyalty Programs:
-
Almost every major brand offers a free-to-join rewards program (e.g., Hertz Gold Plus Rewards, Avis Preferred, National Emerald Club, Alamo Insiders).
-
The Perk: At MIA, members can skip the main lobby entirely. Look for the "Members Only" signs or digital boards in the garage. Your name will be displayed next to a parking stall number, or you can go to a dedicated, much shorter Express Counter in the garage.
-
-
Use Self-Service Kiosks:
-
Brands like Alamo and Budget feature rows of touch-screen kiosks in the main lobby.
-
If you did online check-in beforehand, you can scan your driver's license, swipe your credit card, and print your barcode slip directly from the machine in under two minutes—no human interaction required.
-
3.2 Avoiding Hidden Fees, Toll Scams & Upsells at MIA Rental Counters
If you must speak with a counter agent, have these items ready:
📋 The 5-Item Pick-Up Checklist:
-
Passport: Original physical passport.
-
Your Domestic Driver's License: Must be valid and original (digital licenses are not accepted).
-
International Driving Permit (IDP) or Certified Translation: Required if your domestic license is not in English/Latin characters.
-
Major Credit Card: Under the primary driver's name (Visa, Mastercard, or AMEX).
-
Note: The card must have a chip and enough credit limit for a refundable security deposit (typically $200–$500). Debit cards, cash, or credit cards under a passenger's name are rarely accepted for the hold.
-
-
Booking Voucher: A digital PDF or printed copy of your booking confirmation.
🛡️ How to Deal with Counter Upsells (Your Script Guide):
Rental agents at MIA are highly trained to sell upgrades and optional insurances. Here is how to handle them politely but firmly:
-
The Pitch: "The car you booked is too small for Miami highways. Let me upgrade you to a spacious SUV for just an extra $20 a day."
-
Your Response: "No, thank you. The vehicle class I booked is perfectly fine for me."
-
-
The Pitch: "Our local drivers are very aggressive, and your booking doesn’t cover full liability. You should add our optional coverage."
-
Your Response: "No, thank you. I am fully covered by my third-party insurance / credit card insurance."
-
-
The Pitch: "Miami is full of cashless toll roads. If you don't buy our daily prepaid toll package, you'll face heavy fines."
-
Your Response: "I will decline the daily flat-rate package, thank you. I will pay per actual use or use my own transponder." (See Chapter 4 for a cheaper toll solution).
-
3.3 Heading to the Garage: Self-Service Choices
Once your paperwork is signed, the agent (or kiosk) will assign you to a specific Zone or Stall Number in the parking garage behind the lobby.
-
The "Choice" Experience:
-
At MIA, premium brands like National (Emerald Aisle), Hertz (Ultimate Choice), and Alamo allow you to skip specific stall assignments.
-
Instead, they will direct you to an entire row of vehicles (e.g., "Midsize Row"). You can walk down the row, choose any car you like with the keys already inside, and drive off. Take your time to compare mileage, features, and cleanliness before making your pick.
-
3.4 Pre-Rental Inspection: The "5-Photo, 2-Check" Checklist
Do not drive off into the Miami sunshine just yet! Spend exactly three minutes conducting a thorough inspection. If you find any damage, tell the gate attendant before exiting the garage.
📸 Part 1: The "5-Photo" Evidence Capture (Take photos or a walkaround video)
-
Body & Four Corners: Take photos of all four sides of the car, focusing on the lower bumpers where scuffs are common.
-
Windshield: Check for tiny stone chips or cracks. Miami highways are famous for loose gravel; you don't want to be blamed for a pre-existing crack.
-
Wheels & Rims: Look for curb rash or deep scratches on the metal rims.
-
Dashboard (The Most Important Photo): Turn the car on and photograph the dashboard showing:
-
Fuel Gauge / Battery Charge: Verify it shows absolutely full (or 100% charged).
-
Current Odometer (Mileage): To prove exact starting mileage.
-
Warning Lights: Ensure no "Engine" or "Low Tire Pressure" lights are illuminated.
-
-
Interior & Smoke Smell: Inspect seats for tears, burns, or stains.
-
Crucial Warning: Sniff the air. Rental companies enforce strict No Smoking/Vaping policies and charge a cleaning fee of $250 to $450 if they detect smoke upon return. If you smell smoke left by a previous driver, demand a different car immediately.
-
🔍 Part 2: The "2-Check" Quick Test
-
The A/C Test: South Florida is hot and humid year-round. Turn the air conditioning to max and make sure it blows freezing cold air within 15 seconds.
-
The Toll Box Check: Look at the windshield near the rearview mirror. Check if a SunPass/E-Pass transponder box is mounted there. Note whether it has a manual slider to open/close the box to avoid accidental toll reads.
🔋 Electric Vehicle (EV) Special 2026 Note:
If you are renting an EV, verify the exact battery state of charge (SoC) on the dash. Most rental companies operate a "Like-for-Like" battery policy, meaning you must return it with the same level of charge (usually at least 70% or 80%) to avoid steep recharging fees.
Once satisfied, drive your car to the Exit Gate. Show your driver's license, the barcode slip, and credit card to the attendant. They will scan the car's barcode, the gate will lift, and your Florida road trip officially begins!
[Hertz vs Avis vs Enterprise: The Ultimate U.S. Car Rental Comparison & Money-Saving Guide] make you know which to choose when rent a car.
4. Returning Your Rental Car at MIA: No-Stress Return & Toll Management
While picking up your car is the exciting start of your journey, returning it correctly ensures you don't face unexpected post-trip charges. Between confusing highway lanes, local toll systems, and predatory gas stations surrounding the airport, returning a car at MIA requires a solid plan. Follow this chapter to finish your Florida road trip with peace of mind.
4.1 Best Gas Stations Near MIA for Rental Car Return (Avoid Airport Prices)
⛽ Trap 1: The Airport Gas Station Rip-off
Most rental contracts operate on a "Full-to-Full" fuel policy. You must return the car with a full tank to avoid exorbitant refueling fees (often $9+ per gallon plus service fees) from the rental brand.
-
🚨 Crucial Warning: Do not pull into the gas stations immediately bordering the airport boundaries (specifically those along Le Jeune Road). These stations prey on rushed travelers and charge 50% to 100% higher prices than standard local rates.
-
💡 The Smart Move: Fill up your tank at a reputable station (like Wawa, 7-Eleven, or Chevron) 3 to 5 miles away from the airport. Modern fuel gauges will still display "absolute full" after a 5-mile drive.
-
💾 Keep Your Receipt: Always print out your gas receipt or snap a photo of it. If the rental company’s automated return system mistakenly flags you for a partially empty tank, this receipt is your proof of compliance.
🗺️ Trap 2: The Wrong GPS Destination
Typing "Miami International Airport" or "MIA" into Google Maps or Apple Maps will navigate you straight to the passenger departures/arrivals highfares, where you cannot return a rental car.
-
💡 The Correct GPS Keywords: Enter "Miami Airport Rental Car Center" or "MIA Rental Car Return" as your destination.
-
This will route you directly to the dedicated return lanes located on NW 25th Street.
4.2 Navigating into the Return Lanes
As you approach the airport perimeter, slow down and watch the overhead highway signs closely.
-
Follow the Signs: Look for the green or blue signs indicating "Rental Car Return".
-
Lane Splitting: Once you enter the MIC complex, the lanes will split based on your specific rental brand. Follow the lane painted with your company's logo (e.g., Hertz, Avis, Alamo, Enterprise) to drive into their designated parking level.
-
Do Not Back Up: If you miss your lane, do not attempt to reverse. Continue forward and follow the loop signs to drive around the block and try again.
4.3 The Drop-Off and Inspection (3-Step Defense)
Once you pull into your rental company's return lane, an attendant equipped with a handheld barcode scanner will greet you.
Step 1: Clear Your Personal Belongings
-
Double-check every compartment: the glove box, center console, door pockets, under the seats, and under the trunk floor mat.
-
Editor's Note: The most commonly forgotten items in Miami rental cars are sunglasses (usually left in the overhead sunglasses holder) and USB charging cables.
Step 2: Get and Confirm Your Return Receipt (Receipt)
-
The attendant will scan your vehicle's barcode and check the fuel level and mileage.
-
Do not leave without a receipt. Make sure they print one out or email a PDF to you immediately. Verify that:
-
Fuel Level: Shows as "Full" (or "100%" for EVs).
-
Return Status: No new damage recorded.
-
Total Charges: Match your original booking contract.
-
-
If the attendant simply tells you "you're good to go" without a receipt, ask: "Could I have the return receipt, please?"
Step 3: Photographic Evidence (The Final Double-Check)
Before you walk away, take two quick photos with your phone:
-
A wide photo of the car parked in the return lane (proving you left it in perfect condition).
-
A clear shot of the dashboard showing the odometer and the full fuel/battery gauge.
4.4 Managing Florida Tolls (SunPass) upon Return
Miami’s highways are notoriously cashless. If you used your own toll method, make sure to tie up any loose ends:
-
If you used the rental company's toll package: Any tolls and associated administrative convenience fees will be billed automatically to your credit card on file within 1 to 4 weeks.
-
If you used a "Visitor Toll Pass" (VTP): Remove the VTP hangtag from the rearview mirror and drop it in the designated return boxes at the terminal, or pack it away if you plan to keep it.
-
If you used your own SunPass Portable / Mini sticker:
-
🚨 Vital Tip: Peel the sticker transponder off the windshield before you leave!
-
Log into your SunPass app or website immediately and remove the rental car's license plate from your account. If you forget, your account will continue to be billed for tolls incurred by future renters of that vehicle.
-
4.5 Time Management: How Early Should You Arrive?
"My flight leaves at 3:00 PM. What time should I be at the rental center?" Many travelers underestimate the steps required to transition from driving to sitting at their departure gate.
🕒 The Realistic Return Time Chain:
-
Fueling & Driving to RCC: 10 to 15 minutes (including filling up 3 miles away and navigating highway traffic).
-
Inspecting & Unloading Luggage: 10 to 15 minutes (can take longer if return lanes are busy or if you have lots of bags).
-
Walking to the MIA Mover Station: 5 to 10 minutes (taking the elevator up to Level 4 and walking the pedestrian bridge).
-
MIA Mover Ride: 3 minutes (fixed transit time).
-
Walking to Your Airline Check-in Counter: 5 to 15 minutes (depending on whether your airline is in the North, Central, or South Terminal).
💡 Summary: It takes a minimum of 40 to 60 minutes from the moment you drive into the Rental Car Center to the moment you stand at your airline's check-in desk. This does not include the time spent waiting in airline lines or clearing TSA security.
📅 Recommended Airport Arrival Formula:
To account for unexpected traffic, long security lines, or return backlogs, we recommend arriving at the Rental Car Center:
-
✈️ US Domestic Flights: At least 2.5 to 3 hours before your scheduled flight departure.
-
🌐 International Flights: At least 3.5 to 4 hours before your scheduled flight departure.
4.6 Head to Your Terminal
Once your car is officially returned and your luggage is in hand:
-
Follow the "To Airport" or "MIA Mover" signs to take the escalator or elevator to Level 4 of the MIC.
-
Walk across the climate-controlled pedestrian bridge directly into the MIA Mover Station.
-
Board the free train for the 3-minute ride back to MIA’s main terminal (Level 3 Skyride).
-
Follow the terminal directories to find your check-in lobby, pass through security, and enjoy your flight home!
5. FAQs & Emergency Handling Guide: Tolls, Towing, and Accidents
Even with the best preparation, road trips can sometimes throw unexpected curveballs. We have compiled the top 5 most critical questions and emergency procedures for international travelers driving in and around Miami.
Q: Can I rent and drive a car in Florida using a non-US driver's license?
A: Yes, but with conditions. Florida law permits tourists with valid foreign driver's licenses to drive short-term. However, you cannot present a non-English/non-Latin character license alone. If your domestic license is in a language like Chinese, Arabic, Japanese, or Cyrillic, you must present your original domestic license along with an International Driving Permit (IDP) or a certified English translation.
Q: Can I rent a car at MIA if I am under 25?
A: Yes, but expect extra fees. Almost all rental companies at MIA charge an "Underage Driver Fee" (or Young Renter Fee) for drivers aged 21 to 24. This fee ranges from $15 to $35 per day depending on the brand and is added to your final bill. Additionally, certain luxury or high-performance vehicle classes may be restricted for renters under 25. Most rental brands do not rent to anyone under 21.
Q: What happens if my flight is delayed and I arrive at the Rental Car Center after midnight?
A: Don't panic. Most major rental brands at MIA (such as Hertz, Avis, Alamo, and Enterprise) operate 24/7 or have extended hours specifically to accommodate late-night flight arrivals. To protect your reservation:
-
Provide Your Flight Number: Always input your inbound flight number when booking. The rental systems automatically track delays.
-
Contact Them for Major Delays: If your flight is delayed by more than 6 hours or pushed to the next day, call the specific MIA branch or use their mobile app to notify them so they do not flag you as a "No-Show" and release your car.
Q: I parked my car in South Beach, and now it’s gone. Was it stolen or towed?
A: In busy areas like Miami Beach (especially Ocean Drive, Collins Ave) and Downtown Miami, towing is highly aggressive and fast. If you park in a private lot, block a driveway, park too close to a red fire hydrant, or let your parking meter expire for even 5 minutes, your car will likely be towed. If your car vanishes:
-
Look for the Red Towing Sign: Check the immediate area for a metal red and white sign that says "Tow-Away Zone". It will list the name and phone number of the specific towing company assigned to that block.
-
Call the Tow Yard or Police: If there is no sign, call the local police non-emergency line at 305-673-7900 (Miami Beach Police) or 305-579-6111 (Miami Police). Give them your rental car's license plate number; they can tell you which impound lot has your vehicle.
-
Retrieve Your Vehicle: You must go to the impound lot immediately, bring your rental contract and driver's license, and pay a release fee of $150 to $300 via cash or credit card. Fees accumulate daily, so retrieve it as quickly as possible.
Q: What should I do if I get into a fender bender or damage the rental car?
A: Stay calm and follow these four critical steps to ensure your safety and protect your insurance coverage:
-
Ensure Safety First: Pull the vehicle to a safe spot out of traffic (if possible), turn on your hazard lights, and check for any injuries.
-
Always Call 911 for a Police Report: In the US, regardless of how minor the damage is, you must call the police to the scene. The responding officer will generate a Police Report (or give you a Case Number). Rental insurance policies (including credit card coverage and CDW) almost always require a formal police report to process a claim. Without it, you could be held fully personally liable.
-
Document Everything: Take clear photos of the damage to both vehicles, the license plates, and the accident scene. Exchange contact, driver's license, and insurance information with the other driver.
-
Notify the Rental Company: Call the roadside assistance or emergency number listed on your rental jacket or key fob. Report the incident and follow their instructions. If the vehicle is undriveable, they will arrange a tow and a replacement vehicle.
Conclusion
Miami is a vibrant, sun-drenched paradise, and exploring it by car is the ultimate way to experience the best of Florida. While the airport's massive infrastructure and fast-paced traffic can feel a little intimidating at first, mastering the MIA Mover, executing a thorough pre-rental inspection, and knowing exactly how to return your vehicle will make your rental experience fast, predictable, and stress-free.
We hope this complete, no-nonsense guide gives you the peace of mind to navigate MIA's Rental Car Center like a seasoned local.
Have an amazing, safe road trip, and enjoy the Florida sunshine! Safe travels!
If you like public transpotaion in Miami, please read our [Miami Without a Car: Complete Guide to Free Metromover, South Beach Transport & Smart Travel Tips]
If you plan to watch 2026 FIFA Miami World Cup, read this Transportation Guide: How to Get to Hard Rock Stadium